PIXU - Terminal Image Viewer
Version: 1.3.5
PIXU is a powerful terminal image viewer that renders images directly in your terminal using various protocols and formats.
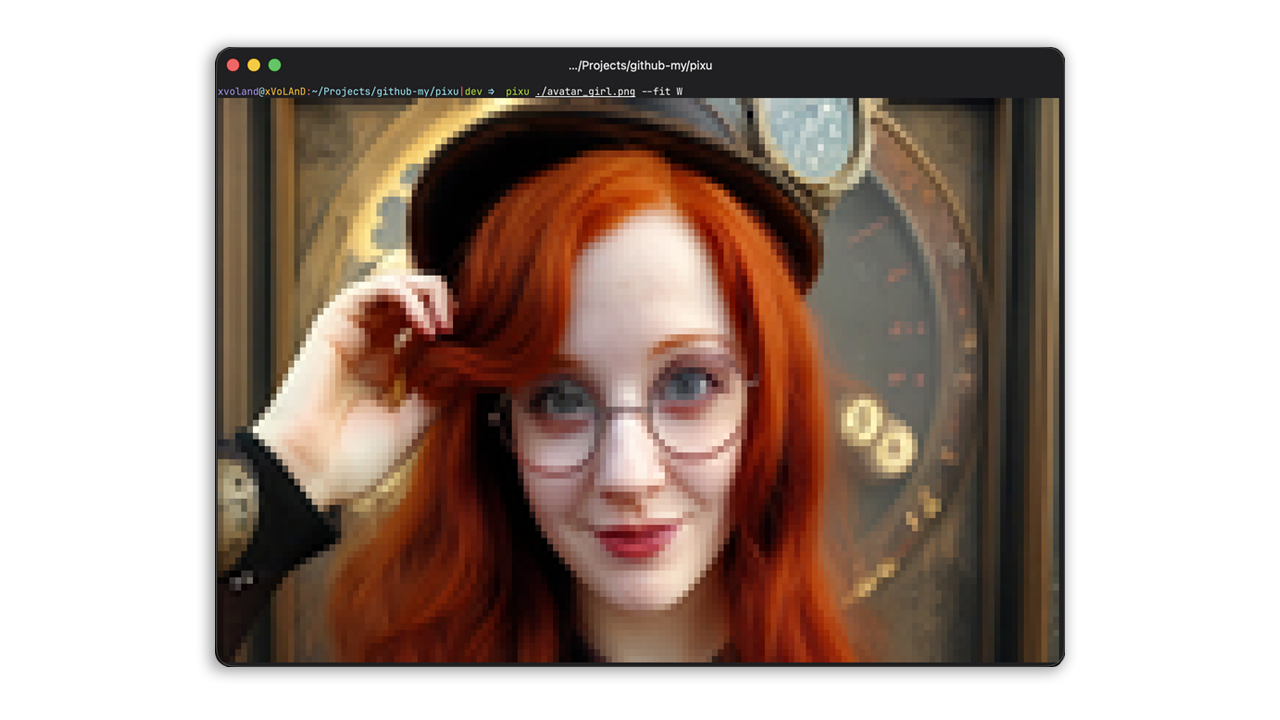
Features
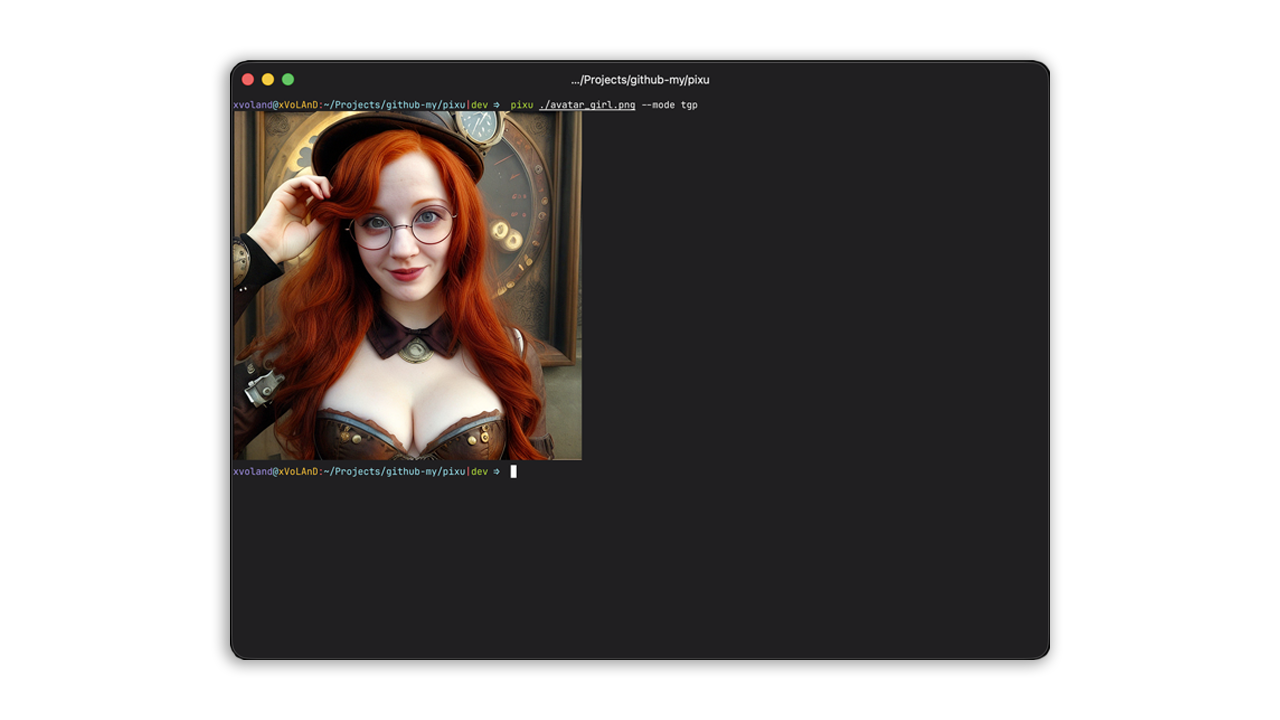
- Multiple rendering modes: RGB, Grayscale, 256-color, ASCII art, TGP (iTerm2/Kitty), and Sixel — or
--mode autoto pick the best one for the current terminal - iTerm2 & Kitty support: Display images inline in modern terminal emulators
- Interactive mode: Browse through images with keyboard navigation
- Clipboard support: Read images directly from clipboard
- Pipeline support: Use with stdin/stdout for shell pipelines
- Cross-platform: Works on Linux, macOS, and Windows
- Color manipulation: Invert colors, apply dithering
Installation
Homebrew
brew tap xvoland/pixu
brew install pixu
The formula lives in the xvoland/homebrew-pixu tap. The first install may
prompt you to trust the tap; answer yes or run brew trust xvoland/pixu first.
From Source
go install github.com/xvoland/pixu@latestFrom Release
# Linux/macOS
curl -sL https://github.com/xvoland/pixu/releases/latest/download/pixu-linux-amd64 -o pixu
chmod +x pixu

# macOS (Apple Silicon)
curl -sL https://github.com/xvoland/pixu/releases/latest/download/pixu-darwin-arm64 -o pixu
chmod +x pixu

# Windows
curl -sL https://github.com/xvoland/pixu/releases/latest/download/pixu-windows-amd64.exe -o pixu.exe
Build from Source
git clone https://github.com/xvoland/pixu.git
cd pixu
make build-local   # builds the binary to ./bin/pixu
./bin/pixu --help
make build-local embeds the git tag into pixu --version (e.g. pixu v1.3.0).
A plain go build reports x.x.x (local); for the exact go build -ldflags
command see AGENTS.md.
Building for distribution
make dist cross-builds every platform into the dist/ folder (binaries are
gitignored; the dist/.gitkeep marker is kept):
make dist                 # build all platforms -> dist/
make dist-windows         # windows/amd64 + windows/arm64
make dist-linux           # linux/amd64 + linux/arm64 + linux/arm
make dist-darwin          # darwin/amd64 + darwin/arm64 (requires macOS + CGo)
make dist/pixu-darwin-arm64          # a single binary
make dist/pixu-windows-amd64.exe # a single Windows binary| Platform | Output in dist/ |
|---|---|
| Windows | pixu-windows-amd64.exe, pixu-windows-arm64.exe |
| Linux | pixu-linux-amd64, pixu-linux-arm64, pixu-linux-arm |
| macOS | pixu-darwin-amd64, pixu-darwin-arm64 |
darwin targets need CGO_ENABLED=1 and must be built on macOS (or with
osxcross); all other targets are pure-Go.
Quick Start
# View an image (default: RGB mode)
pixu image.png

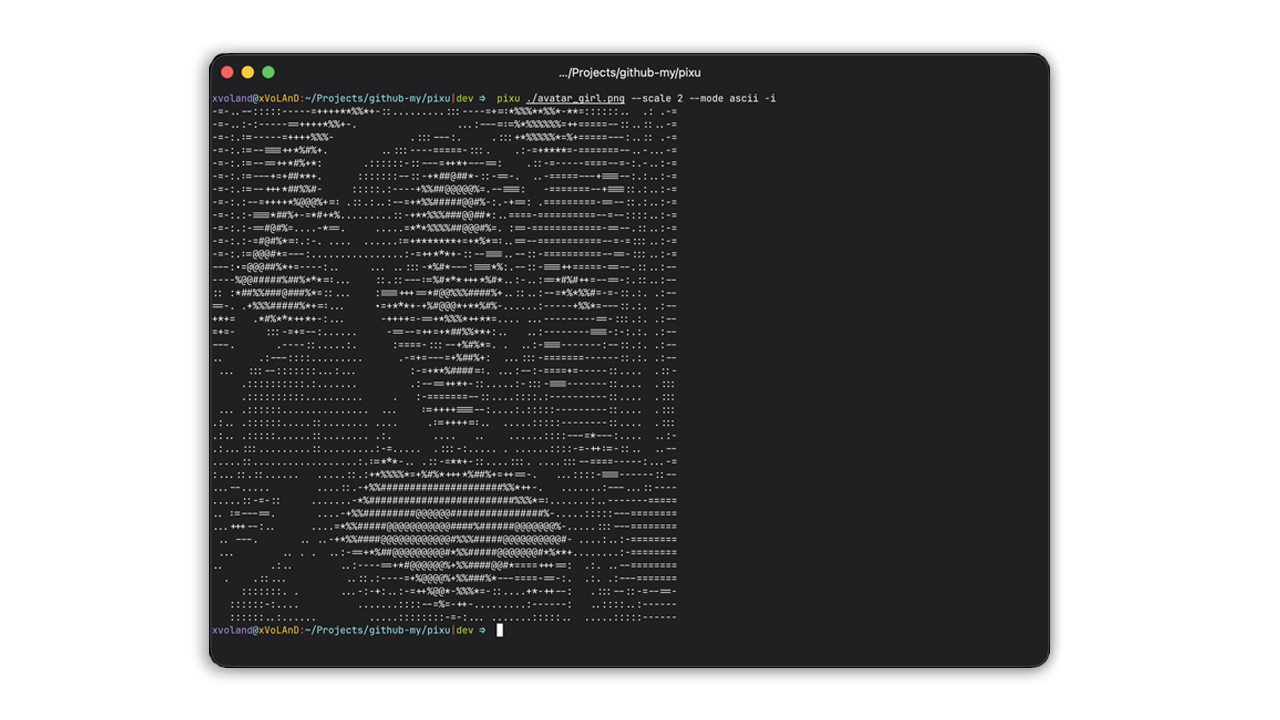
# View in ASCII art
pixu image.png --mode ascii

# View in iTerm2/Kitty (TGP mode)
pixu image.png --mode tgp

# Fit to terminal size
pixu image.png --fit H
Usage
Basic Examples
# Display image in RGB mode (default)
pixu photo.jpg

# Display image in ASCII art
pixu photo.jpg --mode ascii

# Display image in 256-color mode
pixu photo.jpg --mode 256

# Display image in grayscale
pixu photo.jpg --mode grayscale

# Display using Kitty/iTerm2 graphics protocol
pixu photo.jpg --mode tgp

# Display using Sixel protocol (xterm, mlterm)
pixu photo.jpg --mode sixel

# Auto-select the best mode for the current terminal
pixu photo.jpg --mode auto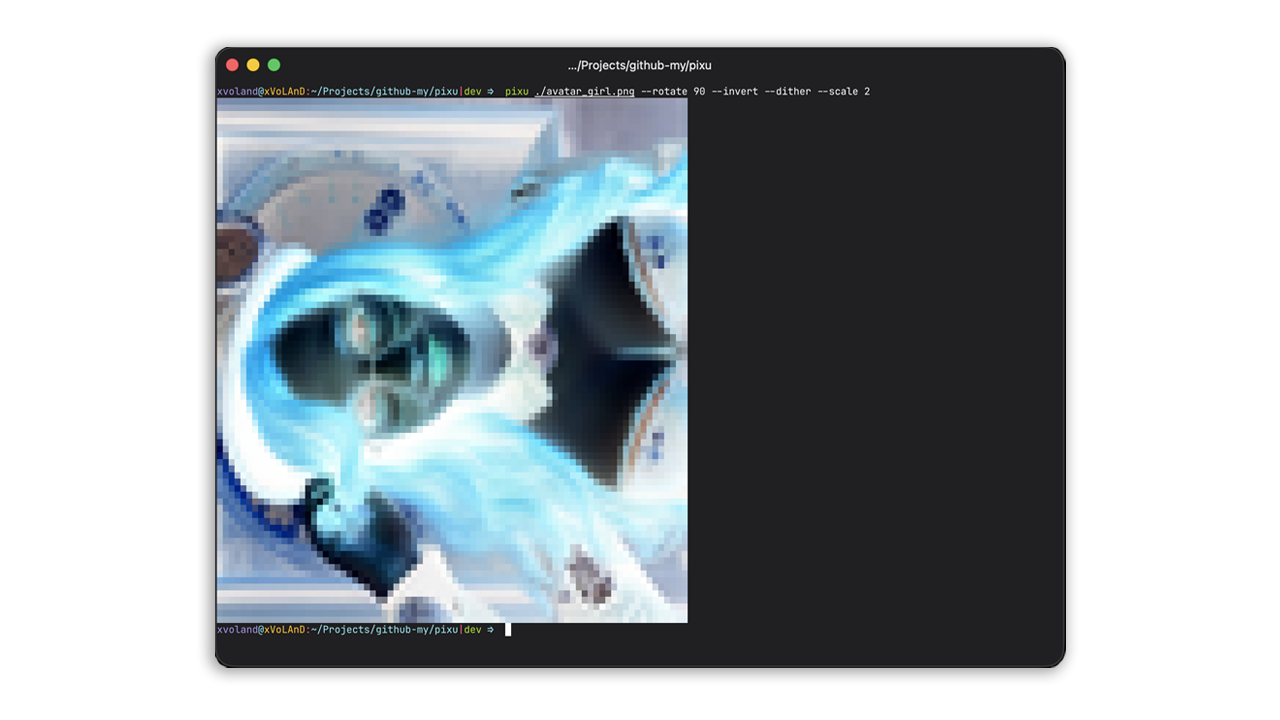
Resizing
# Set width (height calculated automatically)
pixu image.png --width 80

# Set height (width calculated automatically)
pixu image.png --height 40

# Set both width and height
pixu image.png --width 100 --height 50

# Fit to terminal size
pixu image.png --fit        # fit by height (bare --fit = by height)
pixu image.png --fit H      # fit by height

# The chosen axis fills the whole terminal and the other dimension follows the
# image aspect ratio (so the image may extend past the terminal on that axis).
# --fit H stretches to the terminal height; --fit W to the terminal width:
pixu image.png --fit H   # stretch to terminal height
pixu image.png --fit W   # stretch to terminal width

# --fit only selects the axis; scaling is done separately with --scale
# (which multiplies the computed size, including the fitted one):
pixu image.png --fit H --scale 2     # fit by height, then double
pixu image.png --fit W --scale 0.5   # fit by width, then halve

# With TGP mode
pixu image.png --mode tgp --width 800 --height 600
Image Manipulation
# Invert colors
pixu image.png --invert

# Rotate 90 degrees
pixu image.png --rotate 90

# Rotate 180 degrees
pixu image.png --rotate 180

# Rotate 270 degrees
pixu image.png --rotate 270

# Apply Floyd-Steinberg dithering
pixu image.png --dither

# Scale by a factor (0.5 = half, 2 = double) — multiplies the computed size
pixu image.png --scale 0.5
pixu image.png --mode tgp --scale 2

# Combine options
pixu image.png --rotate 90 --invert --width 60
Custom Characters
# Use custom block character (default: ▀)
pixu image.png --char "█"

# Use custom ASCII character set
pixu image.png --mode ascii --char "@#%*+=-:. "

# Use different character for RGB mode
pixu image.png --char "▓"
Input Sources
# From file (default)
pixu image.png

# From stdin
cat image.png | pixu -
pixu - < image.png

# From clipboard
pixu --paste
pixu -p

# From specific input file
pixu --input image.jpg
Output
# Save to file
pixu image.png --output output.txt

# Save ASCII art to file
pixu image.png --mode ascii --output art.txt

# Pipe to file
pixu image.png > output.txt
Interactive Mode
# Start interactive viewer
pixu image.png --interactive
pixu image.png -I

# Browse directory of images
pixu ./photos --interactive
pixu ./photos -I

# Interactive mode with TGP
pixu image.png --mode tgp --interactive
In interactive mode, use:
←/→- Previous/Next imagen/porCtrl+N/Ctrl+P- Next/Previousq/ESC/Ctrl+C- Quit
Other Options
# Show version
pixu --version
# PIXU, v1.3.5 | https://dotoca.net/pixu
# (c) 2026, Vitalii Tereshchuk | xVoLAnD. All rights reserved.

# The same banner is shown by the `version` subcommand and when pixu is run
# without arguments (replacing the previous help screen):
pixu
pixu version

# Show QR code for donation
pixu --qr

# Environment variables
export PIXU_WIDTH=80
export PIXU_HEIGHT=40
export PIXU_MODE=ascii
export PIXU_INVERT=true
export PIXU_CHAR="█"
export PIXU_ROTATE=90
export PIXU_ASCII_CHARS="@#%*+=-:. "

# Custom terminal cell size
export PIXU_CELL_WIDTH=10
export PIXU_CELL_HEIGHT=20
Mode Details
| Mode | Description | Terminal Support |
|---|---|---|
rgb |
True color (24-bit) with block characters | All terminals |
grayscale |
256 shades of gray | All terminals |
256 |
256-color mode | Most terminals |
ascii |
Plain ASCII art | All terminals |
tgp |
Terminal Graphics Protocol (iTerm2/Kitty) | iTerm2, Kitty, Ghostty, WezTerm |
sixel |
Sixel graphics protocol | xterm, mlterm, RLogin, TinyTERM |
auto |
Pick the best mode for the current terminal | Detected automatically |
Note: Sixel requires a Sixel-capable terminal (xterm, mlterm, WezTerm, Ghostty). On unsupported terminals (iTerm2, Terminal.app)
pixuprints a clear error instead of silently producing no output.
Auto mode
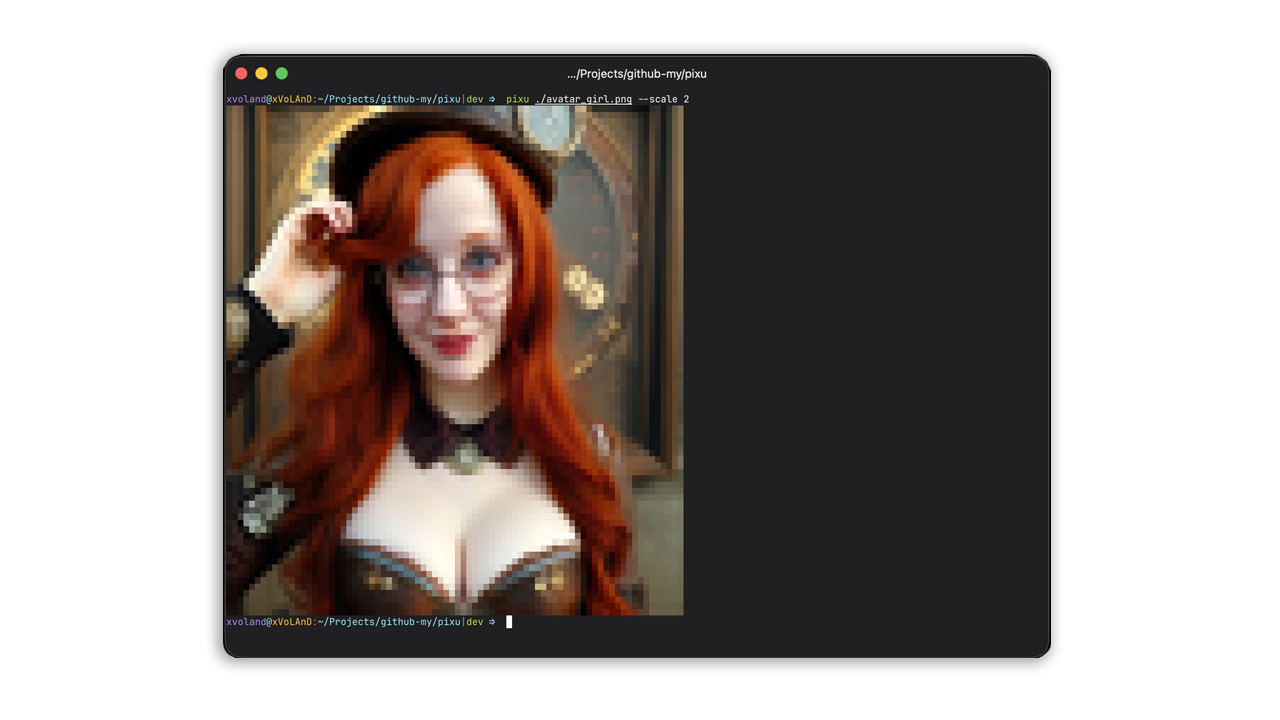
--mode auto (or -m auto) selects the highest-quality protocol the current
terminal supports, without you specifying it:
- TGP (Kitty) — when running in iTerm2, Ghostty, WezTerm, or Kitty
(
TERM=xterm-kittyorKITTY_WINDOW_IDset). - Sixel — when the terminal is Sixel-capable (xterm, mlterm, foot, …).
- RGB — when the terminal advertises true color (
COLORTERM=truecolor). - 256 — when a 256-color palette is available (
TERM=*-256color). - grayscale — as a final fallback.
The resolved mode is the concrete mode, so all other flags behave exactly as if you had passed it explicitly.
Performance
PIXU's hot path is the text-mode renderer and the Floyd-Steinberg dithering
pass. v1.1.0 includes a performance pass measured with go test -bench +
benchstat (Apple M2 Pro, 400x400 image):
- Text rendering (
rgb/256/grayscale/ascii): pixels are read directly from the*image.NRGBAbuffer thatimaging.Resizereturns, avoiding the per-pixelimage.Atinterface dispatch andcolor.Colorboxing, and the ANSI escape sequences are assembled withstrings.Builderinstead offmt.Fprintf. Render-time allocations drop ~97% (≈4181 → 137 per RGB render) and CPU time by 10–38%. - Floyd-Steinberg dithering (
--dither): the three[][]float64row buffers were replaced by two flat[]float64buffers (current + next row) with direct pixel access. Allocations drop from ~321k to 4 per image and runtime by ~64%. rgbTo256color mapping: pure integer arithmetic replacingmath.Max/math.Abs/math.Round, byte-identical to the previous float implementation.- Output:
renderAndOutputand the interactive viewer buffer the whole frame and write it with a single syscall instead of onefmt.Fprintlnper line.
The dithering pass is now fast enough for large images; prefer a smaller
--width only when you just need a quick preview of a very large source.
Requirements
- Go 1.25 or later (for building from source)
- Terminal with true color support (for RGB mode)
- iTerm2, Kitty, Ghostty, or WezTerm (for TGP mode)
- xterm, mlterm, or similar (for Sixel mode)
Configuration
Environment Variables
| Variable | Description | Default |
|---|---|---|
PIXU_WIDTH |
Default width | - |
PIXU_HEIGHT |
Default height | - |
PIXU_MODE |
Default mode | rgb |
PIXU_INVERT |
Invert colors | false |
PIXU_CHAR |
Block character | ▀ |
PIXU_ROTATE |
Rotation | 0 |
PIXU_ASCII_CHARS |
ASCII character set | @#%*+=-:. |
PIXU_CELL_WIDTH |
Terminal cell width (px) | 10 |
PIXU_CELL_HEIGHT |
Terminal cell height (px) | 20 |
PIXU_SCALE |
Default scale factor (auto allowed as mode, not as scale) |
1.0 |
PIXU_DITHER |
Apply Floyd-Steinberg dithering | false |
Use Cases
Pipeline Examples
# Convert image and copy to clipboard
pixu image.png --mode ascii | tee art.txt | pbcopy

# Generate ASCII art for documentation
convert photo.jpg -resize 80x png:- | pixu --mode ascii

# Quick preview from URL
curl -s image.png | pixu -
Shell Aliases
# Add to ~/.bashrc or ~/.zshrc
alias p='pixu --mode ascii --width 80'
alias pxl='pixu --mode tgp --fit'
alias pxs='pixu --interactive'
Scripts
#!/bin/bash
# View all images in directory
for img in *.jpg *.png *.gif; do
  [ -f "$img" ] && pixu "$img" --width 60
done
Practical Examples
Ready-to-use recipes that combine the options above.
Preview a photo in true color
pixu photo.jpgFit an image to your terminal (any mode)
pixu photo.jpg --fit
pixu photo.jpg --mode tgp --fit
pixu photo.jpg --mode sixel --fit
Browse a folder interactively
pixu ./vacation --interactive
pixu ./vacation --interactive --mode tgp
pixu ./vacation --interactive --mode sixel --width 1000
Paste a screenshot straight from the clipboard
pixu --paste
pixu --paste --mode ascii
Turn a logo into ASCII art for a README
pixu logo.png --mode ascii --width 80 --output logo.txtCustom ASCII ramp (dark to light)
pixu x.png --mode ascii --char " .:-=+*#%@"Invert, rotate and dither a scanned document
pixu scan.png --rotate 90 --invert --ditherUse Sixel in a capable terminal (xterm, mlterm, WezTerm, Ghostty)
pixu diagram.png --mode sixel --width 1200Persist settings via environment variables
export PIXU_MODE=tgp
export PIXU_WIDTH=120
export PIXU_ASCII_CHARS=" .:-=+*#%@"
pixu art.png
Dimensions: pixels vs columns
In tgp/sixel modes --width/--height are pixel dimensions:
pixu img.png --mode tgp --width 800 --height 600In text modes (rgb/grayscale/256/ascii) they are character columns
(1 column ≈ 1 source pixel before block rendering):
pixu img.png --width 80Shell Completion
PIXU ships a built-in completion command (provided by Cobra) that generates
autocompletion scripts for bash, zsh, fish, and PowerShell. Generate the script
for your shell and source it from your shell's startup file:
# bash
pixu completion bash > /usr/local/etc/bash_completion.d/pixu   # or ~/.bash_completion
source /usr/local/etc/bash_completion.d/pixu

# zsh
pixu completion zsh > ~/.zsh/completions/_pixu
# make sure ~/.zsh/completions is in your $fpath (or use the path the script prints)

# fish
pixu completion fish > ~/.config/fish/completions/pixu.fish

# PowerShell
pixu completion powershell > pixu.ps1   # then dot-source it from your $PROFILE
Once loaded, press Tab to complete commands, flags (e.g. --mode), and flag
values.
Troubleshooting
Image not displaying correctly
- Use
--mode autoto let pixu pick the best protocol for the current terminal - Use
--mode tgpfor iTerm2, Kitty, Ghostty, or WezTerm - Use
--mode sixelfor xterm, mlterm, or similar - Use
--mode 256for older terminals - Check terminal color support:
printf '\e[48;2;255;0;0mTEST\e[0m\n'
Wrong aspect ratio
- Use
--fitto automatically fit the terminal (works for all modes, includingtgpandsixel);--fit Haligns to height,--fit Wto width, the image aspect ratio is preserved - Adjust
--widthand--height - In
tgp/sixelmodes--width/--heightare pixel dimensions; in text modes they are character columns - Set custom cell size:
PIXU_CELL_WIDTH=12 PIXU_CELL_HEIGHT=24
Performance
- Use a smaller
--widthfor a faster preview of very large images - The dithering pass (
--dither) is optimized in v1.1.0 (≈64% faster, ~321k → 4 allocations); it is fine for typical images
Clipboard (--paste) not working
- On Linux,
--pasteuses the X11 clipboard backend, so it requires X11 (XWayland works). Under native Wayland (no X11) pixu prints a clear error instead of failing silently. - On macOS, pixu reads the clipboard via NSPasteboard (CGo required at build time).
- On Windows, the system clipboard is used directly.
License
Licensed under the PolyForm Noncommercial License 1.0.0. Noncommercial use is free; commercial use requires a separate commercial license from the copyright holder. See LICENSE for the full terms and LICENSE-notice for details.
Author
Copyright © 2026, Vitalii Tereshchuk
GitHub: https://github.com/xvoland/pixu
Buy on Gumroad: https://lor4ik.gumroad.com/l/pixu
Donation: https://paypal.me/xvoland
Patreon: https://patreon.com/xvoland